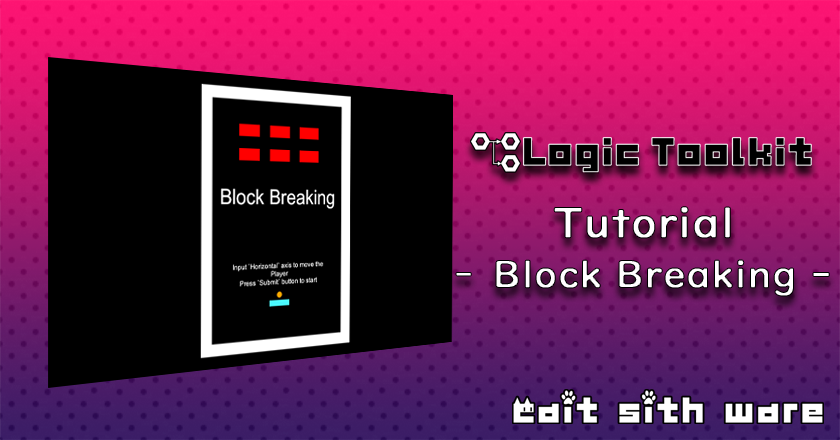
How to create Block Breaking

Overview

I’ll show you how to create a simple block-breaking game using Logic Toolkit.
The finished product has the same content as the sample “BlockBreaking” included with Logic Toolkit.

Prerequisite knowledge

  • Basic usage of Unity editor

Content of study

  • Use Logic Behavior components to control object behavior
  • Use Logic Asset and Logic Player components to reuse common behaviors
  • If it is a simple function, the member access script generation function allows you to configure the behavior without any coding work.
  • Action nodes, State nodes, Branch nodes (flow control), etc. can coexist in the graph.
  • State transition condition judgment can be shared with the Signal Evaluation node
  • Share values ​​with Blackboard variables
  • Blackboard’s Data Link feature allows you to share variables between multiple objects

Shooting environment

The images and videos in this tutorial were taken in the following environment.

OSWindows 11
Unity6000.0.0f1
Logic Toolkit1.0.0
ThemeDark
LanguageEnglish
  • Only the minimum windows in Unity are photographed.
  • Explanations on adjusting the placement of the created nodes are omitted.

Preparing the project

Create a project to practice the tutorial.

Create a project

Create a project for the tutorial.

Project NameLogicToolkit_Tutorial_BlockBreaking
Template3D (Built-In Render Pipeline)

If you have not yet downloaded the template, please download it as well.

For information on how to create projects, see “Add and remove projects in the Unity Hub” in the Unity manual.

Introduction to Logic Toolkit

Introduce Logic Toolkit to your project.

For information on installing Logic Toolkit, see “Installation steps” in the Logic Toolkit manual.

Importing the tutorial package

We have prepared a package in which a scene with block-breaking objects is created in advance.

Download “Tutorial_BlockBreaking”

LogicToolkit_Tutorial_BlockBreaking.unitypackage – Downloaded 138 times – 14.60 KB

Download the package from the link above and import it into your project.

For information on how to import packages, please refer to “Importing local asset packages” in the Unity manual.

Open scene

  • Open Assets/BlockBreaking/Scenes/BlockBreaking scene

Creating player behavior

Create the behavior of the Player (light blue paddle).
Implement the behavior of moving the paddle using the AD key or left/right keys using the Logic Behavior component.

Adding Logic Behavior to Player

  • Select Player object
  • Click the Add Component button in the Inspector window
  • Add the Logic Behavior component by selecting Logic Toolkit/Logic Behavior from the component addition menu.
  • Click the Logic Behavior Edit button to open the Logic Editor window

Edit Player’s Logic Behavior

Implement paddle movement by calculating the movement speed from the horizontal axis input using Input.GetAxis("Horizontal") and assigning it to Rigidbody.linearVelocity.

Creating an Update node

  • Delete the Start node
  • Click on the graph and press the Spacebar while it has focus to open the node creation menu
  • Select the Scripts tab
  • Select Events/Update from the list and create an Update node

Creating a settings node for Rigidbody.linearVelocity

Access members using the Logic Toolkit’s script generation feature.

  • Drag and drop the execution port of the Update node near the right side of the node and open the node creation menu
  • Select the Members tab
  • Enter Rigidbody linearVelocity in the search field
  • Select linearVelocity [Set] of UnityEngine.Rigidbody from the list
  • Select Action from the node type selection menu

When you create a member access script on the Members tab, a new assembly will be created if it has not yet been created for script generation.
If you create a node with the assembly set to [Unselected], the name defaults to LogicToolkitGeneratedScripts.
You can create an assembly with any name by clicking the assembly dropdown and selecting Create New Assembly from the menu.
Also, changing assembly names is not recommended.
If you change it later, the script reference will be broken, so please be careful not to make any mistakes.
The default name is usually fine.

The sample BlockBreaking is named BlockBreaking_GeneratedScripts to avoid duplication when imported.

Files for script generation are created in the Assets/Logic Toolkit/Generated Scripts/assembly name folder.
Basically, there is no need to directly modify files for script generation.

Creating a new Vector3 node

  • Drag and drop the input port of the Linear Velocity field near the left side and open the node creation menu
  • Select the Members tab
  • Enter new Vector3 in the search field
  • Select new Vector3(float x, float y, float z) of UnityEngine.Vector3 from the list
  • Select Compute from the node type selection menu

Creating a Float Mul node

  • Drag and drop the input port of the X field near the left side and open the node creation menu
  • Select the Scripts tab
  • Enter Float Mul in the search field
  • Select Float Mul (Compute) from the list

Editing that Float Mul node

Set movement speed to 5

  • Set the value in the Value 2 field to 5

Creating an Input.GetAxis node

  • Drag and drop the input port of the Value 1 field of the Float Mul node near the left side and open the node creation menu
  • Select the Members tab
  • Enter Input GetAxis in the search field
  • Select GetAxis(string axisName) of UnityEngine.Input from the list
  • Select Compute from the node type selection menu

Editing that Input.GetAxis node

Set to output horizontal input.

  • Set Axis Name field string to Horizontal

Variable speed (optional)

If you write the movement speed directly in the Float Mul, it will be difficult to see where the speed is written when you look back on it later, so it is better to keep such numbers as variables on the blackboard.

  • Select the Blackboard tab in the side panel
  • Select Root tab
  • Click the + button to open the type selection menu
  • Select Primitive/float from the list
  • Set name to Speed
  • set number to 5
  • Drag and drop the Speed ​​variable near the Value 2 field of Float Mul in the graph and open the node creation menu
  • Select Get Variable (Compute)
  • Connect by dragging and dropping from the output port of the Speed ​​acquisition node to the input port of the Value 2 field of Float Mul.

Check Player behavior

Start playing and check the behavior of the Player (light blue paddle).

  • Make sure to move left using A key or Left arrow key.
  • Make sure to move right using D key or Right arrow key.
  • Make sure it stops when it hits a wall

Creating Ball behavior

Create the Ball behavior.
We will implement a process that starts moving the ball diagonally at the start, and when it collides with the player, adjusts the bounce direction depending on the contact position.

Adding Logic Behavior to Ball

  • Select the Ball object in Player/Ball Sockets
  • Click the Add Component button in the Inspector window
  • Select Logic Toolkit/Logic Behavior and add Logic Behavior component
  • Click the Logic Behavior Edit button to open the Logic Editor window

Edit Ball’s Logic Behavior

Creating a Transform.SetParent node

In order to start movement later by key operation, the initial setting is to move in conjunction with the Player.
When you start moving, change the parent object with Transform.SetParent to change it from a child of Player to directly under the root.

  • Drag and drop the execution port of the Start node to open the node creation menu
  • Select the Members tab
  • Enter Transform SetParent in the search field
  • Select SetParent(Tranform parent, bool worldPositionStays) of UnityEngine.Transform from the list
  • Select Action from the node type selection menu

Editing that Transform.SetParent node

Creating a Rigidbody.isKinematic node

In the initial state, Rigidbody’s Is Kinematic is enabled.
We want the ball to physically reflect when it hits a wall or block at the same time it starts moving, so we disable Is Kinematic.

  • Drag and drop the transition port of the Transform.SetParent node and open the node creation menu
  • Select the Members tab
  • Enter Rigidbody isKinematic in the search field
  • Select isKinematic [Set] of UnityEngine.Rigidbody from the list
  • Select Action from the node type selection menu

The Is Kinematic field is unchecked by default, so you do not need to change any settings.

Creating a Rigidbody.linearVelocity node

  • Drag and drop the transition port of the Rigidbody.isKinematic node and open the node creation menu
  • Select the Scripts tab
  • Select Actions/LogicToolkitGeneratedScripts/UnityEngine/Rigidbody/Set Rigidbody.linearVelocity (Action)

The Set Rigidbody.linearVelocity script has already been created when creating Player behavior, so it can also be selected from the Scripts tab.
Of course, the same script will be used even if you select the same member on the Members tab, so feel free to use it as you like.

Creating a Vector3.operator * node

  • Drag and drop the input port of the Linear Velocity field of the Rigidbody.linearVelocity node to open the node creation menu
  • Select the Members tab
  • Enter * in the search field
  • Select operator *(Vector3 a, float d) of UnityEngine.Vector3 from the list
  • Select Compute from the node type selection menu

Editing that Vector3.operator * node

  • Set D field value to 8

Creating a Vector3.normalized node

  • Drag and drop the input port of the A field of the Vector3.operator * node to open the node creation menu
  • Select the Members tab
  • Enter normalized in the search field
  • Select normalized [Get] of UnityEngine.Vector3 from the list
  • Select Compute from the node type selection menu

Editing that Vector3.normalized node

  • Set the X value of the Target field to 1
  • Set the Y value of the Target field to 1

You can set a fixed value directly in the field without having to create a new Vector3 node.

Combine groups (optional)

We were able to implement a behavior that starts moving diagonally immediately after the start.
Let’s organize the nodes connected from the Start node into a group node.

  • With all nodes connected from the Start node selected, press the G key to create a group node.
  • Change group node name to Start moving the ball
  • Click the icon that appears when you hover over the group node
  • In the comment, enter The ball begins to move when play begins.

Creating a PubOnCollisionEnter.Callback node

From here, we will implement processing to adjust the reflection direction based on the positional relationship between the paddle and the ball when it comes into contact with the Player.

  • Press the Space key below the Start node to open the node creation menu
  • Select the Members tab
  • Enter OnCollisionEnter Callback in the search field
  • Select Callback of LogicToolkit.Builtin.Messages.PubOnCollisionEnter from the list
  • Select Event from the node type selection menu

Types in the LogicToolkit.Builtin.Messages namespace are built-in components that call other methods via UnityEvents when a MonoBehavior message is called.
This time, I am using the OnCollisionEnter(Collision) message to receive it as a Logic Toolkit event.

Editing that PubOnCollisionEnter.Callback node

  • Check Require in Target field

The Target field type is InputComponent<PubOnCollisionEnter>.
The Require field provides the ability to add and retrieve a component if it does not exist in the target object.
This time, since Require is checked, the PubOnCollisionEnter component will be added at runtime even if it has not been added to the self object (Ball).
Depending on the purpose of the object, the processing load that is added each time may become a problem.
It is a good idea to consider whether to add components to the object in advance.

Creating a Collision.gameObject node

  • Drag and drop the output port of the Arg 0 field of the PubOnCollisionEnter.Callback node to open the node creation menu
  • Select the Members tab
  • Select Collision/gameObject [Get] from the list
  • Select Compute from the node type selection menu

Creating a GameObject.CompareTag node

  • Drag and drop the output port of the Game Object field of the Collision.gameObject node to open the node creation menu
  • Select the Members tab
  • Select GameObject/CompareTag(string tag) from the list
  • Select Compute from the node type selection menu

Editing that GameObject.CompareTag node

  • Set the string in the Tag field to Player

Creating a Branch node

  • Drag and drop the output port of the Result field of the GameObject.CompareTag node to open the node creation menu
  • Select the Scripts tab
  • Select Flow Controls/Branch from the list

Connecting to that Branch node

  • Connect by dragging and dropping from the execution port of the PubOnCollisionEnter.Callback node to the input port of the Branch node.

Creating a Rigidbody.linearVelocity node

  • Drag and drop the execution port of the Branch node’s True field to open the node creation menu
  • Select the Scripts tab
  • Enter Rigidbody linearVelocity in the search field
  • Select Set Rigidbody.linearVelocity (Action) from the list

Creating a Vector3.operator * node

  • Drag and drop the input port of the Linear Velocity field of the Rigidbody.linearVelocity node to open the node creation menu
  • Select the Scripts tab
  • Enter * in the search field
  • Select Vector3.operator *(Vector3 a, float d) (Compute) from the list

Editing that Vector3.operator * node

  • Set the value in the D field to 8

Creating a Vector3.normalized node

  • Drag and drop the input port of the A field of the Vector3.operator * node to open the node creation menu
  • Select the Scripts tab
  • Enter normalized in the search field
  • Select Get Vector3.normalized (Compute) from the list

Creating a Vector3.operator – node

  • Drag and drop the input port of the Target field of the Vector3.normalized node to open the node creation menu
  • Select the Members tab
  • Enter - in the search field
  • Select operator -(Vector3 a, Vector3 b) of UnityEngine.Vector3 from the list
  • Select Compute from the node type selection menu

Creating a Transform.position node

  • Drag and drop the input port of the A field of the Vector3.operator – node to open the node creation menu
  • Select the Members tab
  • Enter Transform position in the search field
  • Select position [Get] of UnityEngine.Transform from the list
  • Select Compute from the node type selection menu

Creating a Collision.transform node

  • Drag and drop the output port of the Arg 0 field of the PubOnCollisionEnter.Callback node below the Transform.position node you created earlier, and open the node creation menu.
  • Select the Members tab
  • Select Collision/transform [Get] from the list
  • Select Compute from the node type selection menu

Create another Transform.position node

  • Drag and drop the output port of the Transform field of the Collision.transform node to open the node creation menu
  • Select the Members tab
  • Enter position in the search field
  • Select position [Get] of UnityEngine.Transform from the list
  • Select Compute from the node type selection menu

Data port connection

  • Connect by dragging and dropping from the input port of the B field of Vector3.operator – node to the output port of the Position field of the last created Transform.position node.

Group (optional)

Let’s group the nodes connected from OnCollisionEnter into a group node.

  • With all nodes connected from the PubOnCollisiionEnter.Callback node selected, press the G key to create a group node.
  • Change group node name to OnCollisionEnter
  • Click the icon that appears when you hover over the group node
  • In the comments, enter Correct the bounce direction when the Ball hits the Player

Variable speed (optional)

As with Player, it will be useful later if you convert the movement speed into a variable.

  • Select the Blackboard tab in the side panel
  • Select Root tab
  • Click the + button to open the type selection menu
  • Select Primitive/float from the list
  • Set name to Speed
  • set number to 8
  • Drag and drop the Speed ​​variable near the D field of the Vector3.operator * node on the Start node side of the graph to open the node creation menu.
  • Select Get Variable (Compute)
  • Connect by dragging and dropping from the output port of the Speed ​​acquisition node to the input port of the D field of the Vector3.operator * node.
  • Similarly, on the OnCollisionEnter.Callback node side, drag and drop it near the D field of the Vector3.operator * node and open the node creation menu.
  • Select Get Variable (Compute)
  • Connect by dragging and dropping from the output port of the Speed ​​acquisition node to the input port of the D field of the Vector3.operator * node.

Check Ball behavior

Start playing and check the behavior of the ball.

  • Confirm that it starts moving to the upper right at the same time as play starts.
  • When hitting the Player (light blue paddle), the reflection angle differs depending on the position of the hit.
    • If it hits the left side of the paddle, it will reflect to the left.
    • If it hits the right side of the paddle, it will be reflected to the right.

Creating Block behavior

Create Block behavior.
Block has the behavior of destroying its own object if something hits it.
This time, since there is nothing to hit other than the ball, we will omit the judgment of the hit object.

The Block object is prepared as a prefab, and it is assumed that the object will be reused.
Instead of using Logic Behavior directly, let’s reuse the behavior by playing the Logic Asset with Logic Player.

Creating assets

Create Logic folder

Create a folder to save Logic Toolkit related assets.
You can name it anything you like, but this time we’ll create a folder called Logic.

  • Select the BlockBreaking folder in the Project window
  • Click the + button
  • Select Folder from the menu
  • Renamed to Logic

Creating a Logic Asset

  • Select the Logic folder in the Project window
  • Click the + button
  • Select Logic Toolkit/Logic Asset from the menu
  • Renamed to Block Logic
  • Click the Edit button in Logic Asset to open the Logic Editor window

Edit Block Logic

Creating a PubOnCollisionEnter.Callback node

  • Delete Start node
  • Click on the graph and press the Spacebar while it has focus to open the node creation menu
  • Select the Scripts tab
  • Enter OnCollisionEnter Callback in the search field
  • Select PubOnCollisionEnter.Callback (Event) from the list

Editing that PubOnCollisionEnter.Callback node

  • Check Require in Target field

Creating a GameObject.Destroy node

  • Drag and drop the execution port of the PubOnCollisionEnter.Callback node and open the node creation menu
  • Select the Scripts tab
  • Enter Destroy in the search field
  • Select GameObject.Destory(gameObject) (Action) from the list

Unity’s Destroy method is Object.Destroy(Object), but since it would be more convenient to also specify a Self object with InputGameObject, we have prepared a built-in script to do GameObject.Destroy(GameObject).

Group (optional)

  • With all the two created nodes selected, press the G key to create a group node.
  • Renamed to OnCollisionEnter
  • Click the icon that appears when you hover over the group node
  • In the comments, enter If this block is hit by something (only the ball this time), it will destroy itself.

Set Logic Player to Block

Open Block in prefab mode

  • Double-click the Assets/BlockBreaking/Prefabs/Block prefab in the Project window

Add Logic Player

  • Select Block object in Hierarchy window
  • Click the Add Component button in the Inspector window
  • Select Logic Toolkit/Logic Player from the component addition menu and add the Logic Player component.

Editing that Logic Player component

  • Set Block Logic in Asset field

Exiting prefab mode and saving

  • Click the < button in the header of the Hierarchy prefab
  • A dialog will appear asking if you want to save, so click the Save button

Check Block behavior

Start playing and check the behavior of Block.

  • Confirm that the Block object is destroyed when the Ball hits it.

Creating a game clear judgment

The game is cleared if all Block objects are destroyed.
All Block objects are placed in the children of the Blocks object, so let’s clear it when the number of child objects of the Blocks object is 0.

Adding Logic Behavior to Blocks

  • Select Blocks object
  • Click the Add Component button in the Inspector window
  • Select Logic Toolkit/Logic Behavior and add Logic Behavior component
  • Click the Logic Behavior Edit button to open the Logic Editor window

Edit Blocks’ Logic Behavior

Creating an Int Equals node

  • Delete Start node
  • Click on the graph and press the Spacebar while it has focus to open the node creation menu
  • Select the Scripts tab
  • Enter Int Equals in the search field
  • Select Int Equals (Event) from the list

Creating the Transform.childCount node

  • Drag and drop the input port of the Value 1 field of the Int Equals node to open the node creation menu
  • Select the Members tab
  • Enter Transform childCount in the search field
  • Select childCount [Get] of UnityEngine.Transform from the list
  • Select Compute from the node type selection menu

Creating a GameObject.SetActive node

  • Drag and drop the execution port of the Int Equals node and open the node creation menu.
  • Select the Members tab
  • Enter GameObject SetActive in the search field
  • Select SetActive(bool value) of UnityEngine.GameObject from the list
  • Select Action from the node type selection menu

Editing that GameObject.SetActive node

  • Set Canvas/Game Clear object in Target field
    You can set it in one of the following ways:
    • Change Self to Value and set the Canvas/Game Clear object in the Object field
    • Leave it as Self and drag and drop the Canvas/Game Clear object from the Hierarchy window into the Target field
  • Check Value field

Check behavior of clear judgment

Start playing and check the behavior of clear judgment.

  • Confirm that the Game Clear object becomes active when all blocks are destroyed by hitting them with the ball.

Creating a game over judgment

If the ball falls to the bottom, the game is over.
Let’s assume that the determination method is when it touches the Wall Bottom object.
This time, since there are no colliding objects other than the ball, we omit determining the object type.
Also, it would look unnatural if the fallen Ball object remained, so we will discard it.

Adding Logic Behavior to Wall Bottom

  • Select Walls/Wall Bottom object
  • Click the Add Component button in the Inspector window
  • Select Logic Toolkit/Logic Behavior and add Logic Behavior component
  • Click the Logic Behavior Edit button to open the Logic Editor window

Edit Wall Bottom’s Logic Behavior

Creating the PubOnCollisionEnter.Callback node

  • Delete Start node
  • Click on the graph and press the Spacebar while it has focus to open the node creation menu
  • Select the Scripts tab
  • Enter OnCollisionEnter Callback in the search field
  • Select PubOnCollisionEnter.Callback (Event) from the list

Editing that PubOnCollisionEnter.Callback node

  • Check Require in Target field

Creating a Collision.gameObject node

  • Drag and drop the output port of the Arg 0 field of the PubOnCollisionEnter.Callback node to open the node creation menu
  • Select the Scripts tab
  • Enter Collision gameObject in the search field
  • Select Get Collision.gameObject (Compute) from the list

Creating a GameObject.Destroy node

  • Drag and drop the output port of the Game Object field of the Collision.gameObject node to open the node creation menu
  • Select the Scripts tab
  • Enter Destroy in the search field
  • Select GameObject.Destroy(gameObject) (Action) from the list

Connecting OnCollisionEnter and GameObject.Destroy

  • Connect by dragging and dropping the execution port of the PubOnCollisionEnter.Callback node to the input port of the GameObject.Destroy node.

Creating a GameObject.SetActive node

  • Drag and drop the transition port of the GameObject.Destroy node and open the node creation menu
  • Select the Scripts tab
  • Enter GameObject SetActive in the search field
  • Select GameObject.SetActive(bool value) (Action) from the list

Editing that GameObject.SetActive node

  • Set Canvas/Game Over object in Target field
    You can set it in one of the following ways:
    • Change Self to Value and set the Canvas/Game Over object in the Object field
    • Leave it as Self and drag and drop the Canvas/Game Over object from the Hierarchy window into the Target field
  • Check Value field

Checking the behavior of game over judgment

Start playing and check the behavior of game over judgment.

  • Make sure that when the Ball hits the Wall Bottom object, the Ball object is destroyed and the Game Over object becomes active.

Creating Main Logic behavior

Up to this point, we have been using separate objects to switch between displaying game clear and game over, but we will now manage the progress of the game using the Main Logic object.
The game state will be shared with Blackboard Asset, and each object will access the game state through Blackboard’s Data Link.

Creating a Blackboard Asset

  • Select the Logic folder in the Project window
  • Click the + button
  • Select Logic Toolkit/Blackboard from the menu
  • Renamed to Main Scene Blackboard

Editing Main Scene Blackboard

The variables to be created are as follows.

Variable nameTypeExplanation
IsPlayingboolTrue while the game is being played (while the ball is moving and blocks can be broken).
The ball starts moving when switched from false to true.
If it changes from true to false, the game ends and a clear judgment is made.
IsGameClearboolTrue if the game is cleared at the end of the game.
Will be false if the game is over.

Creating the IsPlaying variable

  • Select the Main Scene Blackboard and click the + button on the Blackboard in the Inspector window.
  • Select Primitive/bool from the variable creation menu
  • Renamed to IsPlaying

Creating the IsGameClear variable

  • In the Inspector window, click the Blackboard + button
  • Select Primitive/bool from the variable creation menu
  • Renamed to IsGameClear

Added Logic Behavior to Main Logic

  • Select Main Logic object
  • Click the Add Component button in the Inspector window
  • Select Logic Toolkit/Logic Behavior and add Logic Behavior component
  • Click the Logic Behavior Edit button to open the Logic Editor window

Edit Logic Behavior of Main Logic

Use the State node to manage the progress of the state of Main Logic.
The states to be created are as follows.

State nameExplanation
Game StartThe state immediately after the game starts.
Displays the Game Start object while the Game Start state is active.
Transition to the Game Playing state when you press the Submit button.
Game PlayingThe state in which the game is being played.
The ball moves and you can enjoy breaking blocks.
When the IsPlaying variable becomes false, determine IsGameClear and transition to the Game Clear state or Game Over state.
Game ClearDestroy all blocks and clear the game.
Show Game Clear object.
Reload the scene when you press the Submit button.
Game OverThe ball falls and the game is over.
Show Game Over object.
Reload the scene when you press the Submit button.

A state is prepared as a type of execution node.
By connecting the State node with the Action node, Branch node, etc. that we have been using so far, we can incorporate states into the sequence of flows.

Creating a Main Scene data link

  • Select the Blackboard tab in the side panel
  • Select the Data Link tab
  • Click the + button
  • Rename to Main Scene
  • Set Share Type field to Scene
  • Set the Blackboard Asset field to Logic/Main Scene Blackboard asset

When you use the Data Link function to reference Blackboard, Data Links with the same Share Type, Tag, and Blackboard Asset are shared, allowing you to access the same variables.

Creating the Game Start state

  • Drag and drop the execution port of the Start node to open the node creation menu
  • Select the Scripts tab
  • Select State from list
  • Renamed to Game Start

Adding GameObject.SetActive component

  • Click the + button in the Components field of the Game Start state
  • Select the Scripts tab
  • Enter GameObject SetActive in the search field
  • Select GameObject.SetActive(bool value) from the list

Up until now, GameObject.SetActive(bool value) has been used in the Action node, but it is implemented in a script called ActionComponent, so it can also be used as a component such as a State node.

Editing that GameObject.SetActive component

  • Change the Methods field to only On Activated
  • Set Canvas/Game Start object in Target field
    You can set it in one of the following ways:
    • Change Self to Value and set the Canvas/Game Start object in the Object field
    • Leave it as Self and drag and drop the Canvas/Game Start object from the Hierarchy window into the Target field
  • Check Value field

If you use ActionComponent for the State node, a Methods field will be added.
ActionComponent is a script that just executes a process immediately, so you can control when it executes by setting the Methods field.
In this case, On Activated is a setting that is executed when the state becomes active.

Adding a set component for the IsPlaying variable

  • Drag and drop the IsPlaying variable of the Main Scene data link to the bottom of Components in the Game Start state to open the component addition menu.
  • Select Set Variable from the list

Editing that set component for the IsPlaying variable

  • Change the Methods field to only On Activated

Adding a GameObject.SetActive component

  • Click the + button in the Components field of the Game Start state
  • Select the Scripts tab
  • Enter GameObject SetActive in the search field
  • Select GameObject.SetActive(bool value) from the list

Editing that GameObject.SetActive component

  • Change the Methods field to only On Deactivated
  • Set Canvas/Game Start object in Target field
    You can set it in one of the following ways:
    • Change Self to Value and set the Canvas/Game Start object in the Object field
    • Leave it as Self and drag and drop the Canvas/Game Start object from the Hierarchy window into the Target field

This time, On Deactivated is a setting that is executed when the state becomes inactive.

Adding an Input.GetButtonDown component

  • Click the + button for Components in the Game Start node
  • Select the Members tab
  • Enter Input GetButtonDown in the search field
  • Select GetButtonDown(string buttonName) of UnityEngine.Input from the list

Members whose return value is bool type are implemented using a script called EvaluateComponent.
EvaluateComponent is a node component for evaluating something.
This time, we will use Input.GetButtonDown(string buttonName) to determine if the button has been pressed, evaluate the press of the Submit button, and transition the state.

Editing that Input.GetButtonDown component

  • Set Button Name field to Submit

Creating the Game Playing State

  • Drag and drop the signal port of the Signal field of the Input.GetButtonDown component to open the node creation menu
  • Select the Scripts tab
  • Select State from list
  • Renamed to Game Playing

If you connect the output signal port directly to the execution node, the transition will occur to the destination node when the conditions are met and the signal turns on.

Adding a set component for the IsPlaying variable

  • Drag and drop the IsPlaying variable of the Main Scene data link to Components of the Game Playing state to open the add component menu
  • Select Set Variable from the list

Editing that set component for the IsPlaying variable

  • Change the Methods field to only On Activated
  • Check the Is Playing field

Adding a Bool Equals component

  • Click the + button for Components in the Game Playing state
  • Select the Scripts tab
  • Enter Bool Equals in the search field
  • Select Bool Equals from the list

Creating a Get IsPlaying Variable Node

You can also create variable access nodes by dragging and dropping data ports.

  • Drag and drop the input port of the Value 1 field of the Bool Equals component and open the node creation menu
  • Select the Scripts tab
  • Enter IsPlaying in the search field
  • Select IsPlaying [Get] (Compute) of Compute/Variables/DataLink/Main Scene from the list

Creating a Time.timeScale node

While displaying the game results, try setting Time.timeScale to 0 to enter a pause state.

  • Drag and drop the signal port of the Signal field of the Bool Equals component and open the node creation menu
  • Select the Members tab
  • Enter Time timeScale in the search field
  • Select timeScale [Set] of UnityEngine.Time from the list
  • Select Action from the node type selection menu

Signal ports can transition to flow control nodes such as States, Actions, Tasks, and Branches.

Creating a Branch Node

The processing branches depending on the value of the IsGameClear variable.

  • Drag and drop the transition port of the Time.timeScale node and open the node creation menu
  • Select the Scripts tab
  • Select Flow Controls/Branch from the list

Creating a Get IsGameClear Variable Node

  • Drag and drop the input port of the Condition field of the Branch node to open the node creation menu
  • Select the Scripts tab
  • Enter IsGameClear in the search field
  • Select IsGameClear [Get] of Compute/Variables/DataLink/Main Scene from the list

Creating a Game Clear state

  • Drag and drop the transition port of the True field of the Branch node to open the node creation menu
  • Select the Scripts tab
  • Select State from the list
  • Change the name to Game Clear

Adding a GameObject.SetActive component

  • Click the + button in the Components field of the Game Clear state to open the component addition menu
  • Select the Scripts tab
  • Enter GameObject SetActive in the search field
  • Select GameObject.SetActive(bool value) from the list

Editing that GameObject.SetActive component

  • Set the Methods field to On Activated only
  • Set the Target field to the Canvas/Game Clear object
    You can set it in one of the following ways:
    • Change Self to Value and set the Canvas/Game Clear object in the Object field
    • Leave it as Self and drag and drop the Canvas/Game Clear object from the Hierarchy window into the Target field
  • Check the Value field

Creating a Game Over state

  • Drag and drop the transition port of the False field of the Branch node to open the node creation menu
  • Select the Scripts tab
  • Select State from the list
  • Change the name to Game Over

Adding a GameObject.SetActive component

  • Click the + button in the Components field of the Game Over state to open the component addition menu
  • Select the Scripts tab
  • Enter GameObject SetActive in the search field
  • Select GameObject.SetActive(bool value) from the list

Editing that GameObject.SetActive component

  • Set the Methods field to On Activated only
  • Set the Target field to the Canvas/Game Over object
    You can set it in one of the following ways:
    • Change Self to Value and set the Canvas/Game Over object in the Object field
    • Leave it as Self and drag and drop the Canvas/Game Over object from the Hierarchy window into the Target field
  • Check the Value field

Creating a Signal Evaluation node

The Game Clear state and Game Over state both have the behavior of reloading the scene when the Submit button is pressed.
If there is a transition condition, you can use the Signal Evaluation node to standardize the judgment.

  • Drag and drop the signal port of the Game Clear state to open the node creation menu.
  • Select the Scripts tab.
  • Select Signals/Signal Evaluation from the list.

The signal port in the State header will be on while the state is active.
By connecting a Signal Evaluation node to this signal port, you will be able to determine transition conditions while the state is active.

Adding a Input.GetButtonDown component

  • Click the + button in Conditions of the Signal Evaluation node
  • Select the Scripts tab
  • Enter Input GetButtonDown in the search field
  • Select Input.GetButtonDown(string buttonName) from the list

Editing that Input.GetButtonDown component

  • Set the Button Name field to Submit

Connecting the Game Over state to the Signal Evaluation node

  • Drag and drop the signal port of the Game Over state to the input port of the Signal Evaluation node (the port connected to the Game Clear state) to connect it.

If multiple signal wires are connected to the same input port, the result will be true if any one of the signals is on.

Creating a Time.timeScale node

Set Time.timeScale back to 1 before reloading the scene.

  • Drag and drop the transition port of the Signal Evaluation node to open the node creation menu.
  • Select the Scripts tab.
  • Enter Time timeScale in the search field.
  • Select Set Time.timeScale (Action) from the list.

Editing that Time.timeScale node

  • Change the Time Scale field to 1

Creating a SceneManager.LoadScene node

  • Drag and drop the transition port of the Time.timeScale node and open the node creation menu.
  • Select the Members tab.
  • Enter SceneManager LoadScene in the search field.
  • Select LoadScene(string sceneName) of UnityEngine.SceneManagement.SceneManager from the list.
  • Select Action from the node type selection menu.

Editing that SceneManager.LoadScene node

  • Change the Scene Name field to BlockBreaking

Ball behavior changes

Change the behavior so that movement begins when the IsPlaying variable becomes true.

Preparing for Change

  • Select the Ball object in Player/Ball Socket
  • Open the Ball object’s Logic Behavior in the Logic Editor window.

Creating a Main Scene data link

  • Select the Blackboard tab in the side panel
  • Select the Data Link tab
  • Click the + button
  • Rename to Main Scene
  • Set Share Type field to Scene
  • Set the Blackboard Asset field to Logic/Main Scene Blackboard asset

Create an event node for changing the IsPlaying variable

  • Delete the Start node
  • Drag and drop the IsPlaying variable of the Main Scene data link to the area where the Start node was, and open the node creation menu.
  • Select Change Variable Event (Event) from the list.

Creating a Branch Node

  • Drag and drop the output port of the Is Playing field of the event node to change the IsPlaying variable, and open the node creation menu.
  • Select the Scripts tab.
  • Select Flow Controls/Branch from the list.

Connecting to a Branch node

  • Drag and drop the execution port of the IsPlaying variable change event node to the input port of the Branch node to connect it.
  • Drag and drop the transition port of the True field of the Branch node to the input port of the Transform.SetParent node to connect it.

Blocks behavior changes

The clear determination will be made so that when all objects are destroyed, a notification is sent to the Main Logic.
This time, we share the Main Scene Blackboard using the Data Link function, set the IsGameClear variable to true, and then set the IsPlaying variable to false, which will switch the Main Logic to the Game Clear state.

Preparing for Change

  • Select the Blocks object
  • Open the Logic Behavior of the Blocks object in the Logic Editor window.

Creating a Main Scene data link

  • Select the Blackboard tab in the side panel
  • Select the Data Link tab
  • Click the + button
  • Rename to Main Scene
  • Set Share Type field to Scene
  • Set the Blackboard Asset field to Logic/Main Scene Blackboard asset

Create a setting node for the IsGameClear variable

  • Delete the GameObject.SetActive node that activates the Game Clear object
  • Drag and drop the IsGameClear Main Scene data link to the area where the GameObject.SetActive node was located, and open the node creation menu.
  • Select Set Variable (Action) from the list.

Editing that setting node for the IsGameClear variable

  • Check the Is Game Clear field

Connecting to that setting node for the IsGameClear variable

  • Drag and drop the execution port of the Int Equals node to the input port of the Is Game Clear variable setting node to connect it.

Create a setting node for the IsPlaying variable

  • Drag and drop the IsPlaying Main Scene data link to the right of the IsGameClear variable setting node and open the node creation menu.
  • Select Set Variable (Action) from the list.

Connecting to that setting node for the IsPlaying variable

  • Drag and drop the transition port of the IsGameClear variable’s setting node to the input port of the IsPlaying variable’s setting node to connect it.

Wall Bottom behavior changes

Change the system so that the game over determination when the ball falls is notified to the Main Logic side.
This time, we share the Main Scene Blackboard using the Data Link function, set the IsGameClear variable to false, and then set the IsPlaying variable to false, which will switch the Main Logic to the Game Over state.

Preparing for Change

  • Select the Walls/Wall Bottom object
  • Open the Logic Editor window for the Wall Bottom object’s Logic Behavior.

Creating a Main Scene data link

  • Select the Blackboard tab in the side panel
  • Select the Data Link tab
  • Click the + button
  • Rename to Main Scene
  • Set Share Type field to Scene
  • Set the Blackboard Asset field to Logic/Main Scene Blackboard asset

Create a setting node for the IsGameClear variable

  • Delete the GameObject.SetActive node that activates the Game Over object
  • Drag and drop the IsGameClear Main Scene data link to the area where the GameObject.SetActive node was located, and open the node creation menu.
  • Select Set Variable (Action) from the list.

Connecting to that setting node for the IsGameClear variable

  • Drag and drop the transition port of the GameObject.Destroy node to the input port of the Is Game Clear variable setting node to connect it.

Create a setting node for the IsPlaying variable

  • Drag and drop the IsPlaying Main Scene data link to the right of the IsGameClear variable setting node and open the node creation menu.
  • Select Set Variable (Action) from the list.

Connecting to that setting node for the IsPlaying variable

  • Drag and drop the transition port of the IsGameClear variable’s setting node to the input port of the IsPlaying variable’s setting node to connect it.

Check the behavior of the main logic

Play it and see how the game works.

  • Immediately after starting play, confirm that the ball does not move
  • Confirm that the ball moves in tandem with the player’s movement
  • Confirm that it starts moving when the Submit button (Space key or Enter key by default) is pressed
  • Confirm that Game Clear is displayed when all blocks are destroyed
  • Confirm that the scene is reloaded when the Submit button is pressed while Game Clear is displayed
  • Confirm that the game continues to operate even after the scene is reloaded
  • Confirm that Game Over is displayed when the ball falls
  • Confirm that the scene is reloaded when the Submit button is pressed while Game Over is displayed

Setting Physics Bounce Threshold (optional)

After playing a few times, you may find that after the ball hits a wall, it starts moving horizontally, making it virtually impossible to progress.
This is because Unity’s Physics settings set the speed towards the wall to 0 if the speed at the time of collision is below a certain value.
In Breakout, we want the ball to always bounce, so you can solve this problem by setting the Physics bounceThreshold to 0.

There are two ways to set this:

  • Configure Project Settings
  • Member Access Settings

Configure Project Settings

If you don’t need to change it depending on the scene, this can be easily solved by setting it in the Project Settings.

  • Select Edit/Project Settings from the menu
  • Select the Physics/Settings category
  • Select the Game Object tab
  • Change the Bounce Threshold field to 0

Member Access Settings

If you need to change it depending on the scene, you can set Physics.bounceThreshold via member access.

  • Select the Main Logic object
  • Drag and drop the execution port of the Start node to open the node creation menu
  • Select the Members tab
  • Enter Physics bounceThreshold in the search field
  • Select bounceThreshold [Set] of UnityEngine.Physics from the list
  • Select Action from the node type selection menu
  • Connect the transition port of the created Action node to the input port of the Game Start state

Complete

This completes the Logic Toolkit tutorial “How to create Block Breaking”

Content of study

Let’s review what we’ve learned.

  • Use Logic Behavior components to control object behavior
  • Use Logic Asset and Logic Player components to reuse common behaviors
  • If it is a simple function, the member access script generation function allows you to configure the behavior without any coding work.
  • Action nodes, State nodes, Branch nodes (flow control), etc. can coexist in the graph.
  • State transition condition judgment can be shared with the Signal Evaluation node
  • Share values ​​with Blackboard variables
  • Blackboard’s Data Link feature allows you to share variables between multiple objects

Post completion (optional)

Finally, it would be a good idea to post your completion of the tutorial on social media as a record.